

Quick summary
Fresh caulk keeps water out of your walls and floor. Learn how to remove the old bead, prep the joint, choose the right caulk, and get a clean, lasting seal.
- Difficulty
- Beginner
- Time
- 1 to 2 hours, plus 24 hours to cure
- Material cost
- $10 to $30 for caulk and supplies
- Read time
- 7 min
Prices are for a standard alcove tub with common tools on hand. A large corner tub, a whirlpool or heavy mold may need more supplies or a pro.
The line of caulk where your tub meets the wall looks like a small thing. It is not. It is the only thing between your shower spray and the wood behind the wall. When that line cracks, peels or turns black, water gets in. Over months, it rots framing, ruins drywall and feeds mold.
Recaulking is one of the best low-cost jobs you can do. It takes an afternoon. Here is how to do it so the bead looks clean and actually lasts.
When to recaulk, and when it is not enough
Caulk wears out. Most beads last a handful of years in a wet room. Plan to check yours every season. Recaulk if you see gaps, cracks, peeling edges or black spots that will not scrub off.
Caulk cannot fix everything, though. If the tub itself flexes or moves when you step in, the gap will keep opening. If the wall tile is loose or the wall feels soft, water has already done damage. And if you see stains on the ceiling below, you may have a bigger leak. Read our guide on a shower leaking through the ceiling before you grab the caulk gun.
Pick the right caulk
Do not buy the cheapest tube. Look for a product labeled for kitchens and baths, with mildew resistance.
- 100 percent silicone. Stays flexible and waterproof. It resists mold well. It is the usual choice for tubs. It does not take paint.
- Hybrid or polymer sealants. Easier to tool, clean up with water in some cases, and some can be painted. Check that the label says it is rated for wet areas.
- Acrylic latex caulk. Easy to use and paintable, but it shrinks and cracks sooner. Use it only where there is little water.
Pick a color that matches your tub or grout. Clear shows every flaw in the joint.
Why the prep matters more than the caulk
Most failed caulk jobs are prep failures. New caulk will not stick to old caulk, soap scum, or damp surfaces. Take out every bit of the old bead. Clean the joint with rubbing alcohol. Let it dry completely. Then fill the tub with water before you caulk. The weight of the water pushes the tub down to where it sits when someone is bathing. If you caulk an empty tub, the gap opens when it fills and the bead splits.
Gaps too big for caulk
If the gap is wider than about a quarter inch, caulk alone will not hold. Use a foam backer rod to fill the depth, then caulk over it. If the gap is huge, the tub may have settled or the wall may have shifted. That is a sign to look closer.
Tired tile, damaged walls or a worn tub are signs that you are past a caulk fix. A full bathroom remodel gives you new waterproofing and a surround built to last. If you are thinking about what to upgrade, our guide on mold on a bathroom ceiling covers the ventilation side, which often goes hand in hand with caulk problems.
Symptoms and warning signs
- Cracks, gaps or peeling caulk along the tub edge
- Black or pink mold stuck in the caulk line
- Caulk that pulls away from the wall or tub
- Water dripping behind the tub or along the floor
- Soft or discolored drywall near the tub
- A musty smell in the bathroom
Common causes
- Caulk has aged and lost flexibility
- Poor prep when it was first applied
- The tub flexed as it filled and emptied
- Mildew grew in a damp, poorly ventilated bathroom
- Wrong product, such as indoor latex caulk in a wet area
- Gap too wide for caulk alone
How to diagnose the problem
- Press along the bead and look for gaps or soft spots
- Scrape a small test section. If the mold goes deep, the caulk has failed
- Check behind the tub through an access panel, if there is one
- Press the wall near the tub. Soft drywall means water damage
- Step into the tub and watch for flexing at the edge
- Look under the bathroom for stains on a ceiling or basement
Tools and materials
Tools
- Utility knife or caulk removal tool
- Plastic scraper
- Caulk gun
- Painter's tape
- Rubbing alcohol and clean rags
- Old toothbrush
- Small bowl of soapy water or caulk finishing tool
- Vacuum
Materials
- Mildew-resistant silicone or hybrid caulk rated for baths
- Foam backer rod for gaps over 1/4 inch
- Painter's tape
- Isopropyl alcohol
- Paper towels
Safety first
- Open a window and run the fan. Silicone fumes can be strong.
- Wear gloves and eye protection when scraping and cleaning.
- Use a respirator if you are cleaning heavy mold.
- Do not use the tub until the caulk has cured, usually 24 hours.
Step-by-step repair
- Cut the old caulk along both edges with a utility knife.
- Pull out the bead with a scraper or caulk removal tool. Remove every bit.
- Scrub the joint with alcohol and a toothbrush. Let it dry fully, ideally for several hours.
- Fill the tub with water. Leave it in until you finish caulking.
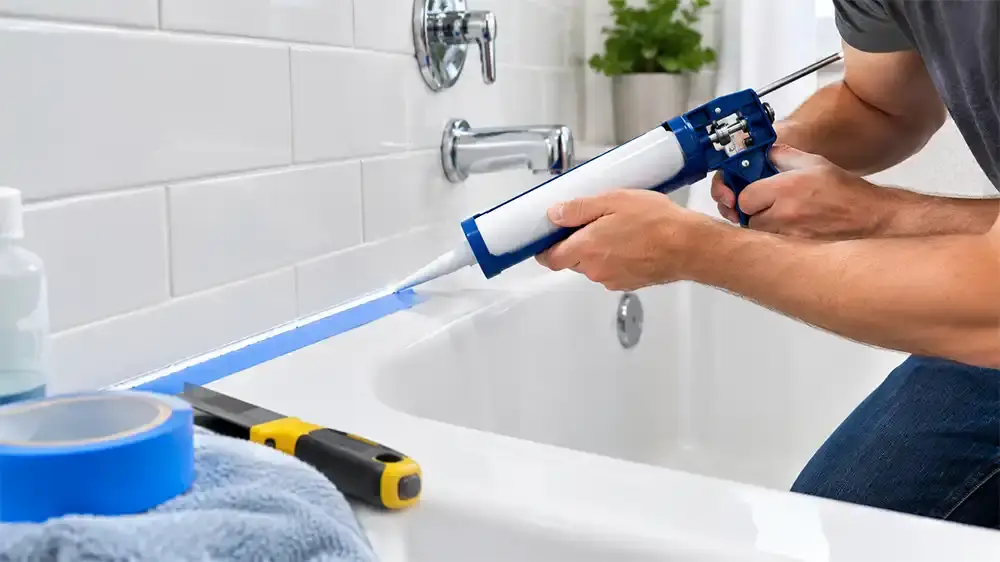
- Apply painter's tape about 1/8 inch above and below the joint for crisp lines.
- Cut the tip of the caulk tube at a 45 degree angle, with a small opening.
- Run a steady, continuous bead along the joint. Push the caulk into the gap.
- Smooth the bead with a wet finger or a finishing tool in one pass.
- Pull the tape off while the caulk is wet, at a low angle.
- Let the caulk cure for 24 hours before letting it get wet. Then drain the tub.
Common mistakes to avoid
- Caulking over old caulk or mold
- Caulking when the joint is damp
- Skipping the water-fill step
- Using too much caulk and trying to fix it with more caulk
- Choosing clear or non-mildew-resistant caulk
- Using the tub before the caulk cures
Troubleshooting
- Caulk cracks again within weeks: the tub moved or the joint was not empty of water when you caulked.
- Bead looks lumpy: cut a smaller opening and tool it in one pass.
- Mold returns fast: improve ventilation and dry the area after showers.
- Caulk will not stick: the surface was dirty or damp. Remove and re-prep.
- Gap keeps reopening: check for movement, loose tile or a settling tub.
Repair or replace?
New caulk is the right fix for a worn bead on a solid tub and wall. If the tub is cracked, the wall behind it is soft, or the tile is loose, caulk only covers the problem. In that case, replacing the surround or remodeling the bathroom saves money in the long run.
When to call a professional
Call a pro if you find soft drywall, rot, active leaks or a lot of mold behind the tub. Also call if the tub moves under your weight, or if tile is falling off the wall. Those are signs of water damage that caulk cannot fix. Our bathroom remodeling team can inspect and repair the whole area.
Delaware considerations
Delaware's humid summers keep bathrooms damp for longer, and mold loves it. Run the fan during and for about 20 minutes after each shower, and wipe the tub edge when you can. Homes near the coast also have more air moisture, so check caulk every spring and fall. If you are a seasonal resident, check the caulk before you close up the house for the winter.
Frequently asked questions
How often should I recaulk my bathtub?
Check it every season, and recaulk when you see cracks, gaps or mold that will not clean off. Many beads need attention every few years.
What is the best caulk for a bathtub?
A mildew-resistant 100 percent silicone or a high-quality hybrid sealant rated for baths. Avoid basic acrylic latex in wet areas.
Do I have to remove the old caulk first?
Yes. New caulk does not bond well to old caulk. Remove all of it and clean the joint.
Why do I fill the tub before caulking?
The weight of water pushes the tub down. Caulking in that position keeps the bead from splitting when the tub is used.
How long before I can shower after caulking?
Wait about 24 hours, or follow the time on the tube. Some products cure faster, but waiting is safer.
Can I caulk over mold?
No. Clean the area, fix the moisture source and remove the old caulk first. Otherwise the mold will grow back through the new bead.